
At 3D Vector, some of the most interesting projects are the ones that cannot be produced using a single manufacturing method. They require a combination of design thinking, precision machining, fabrication, additive manufacturing, finishing, and careful assembly.
A recent project completed for Rosenberg Canada is a great example.
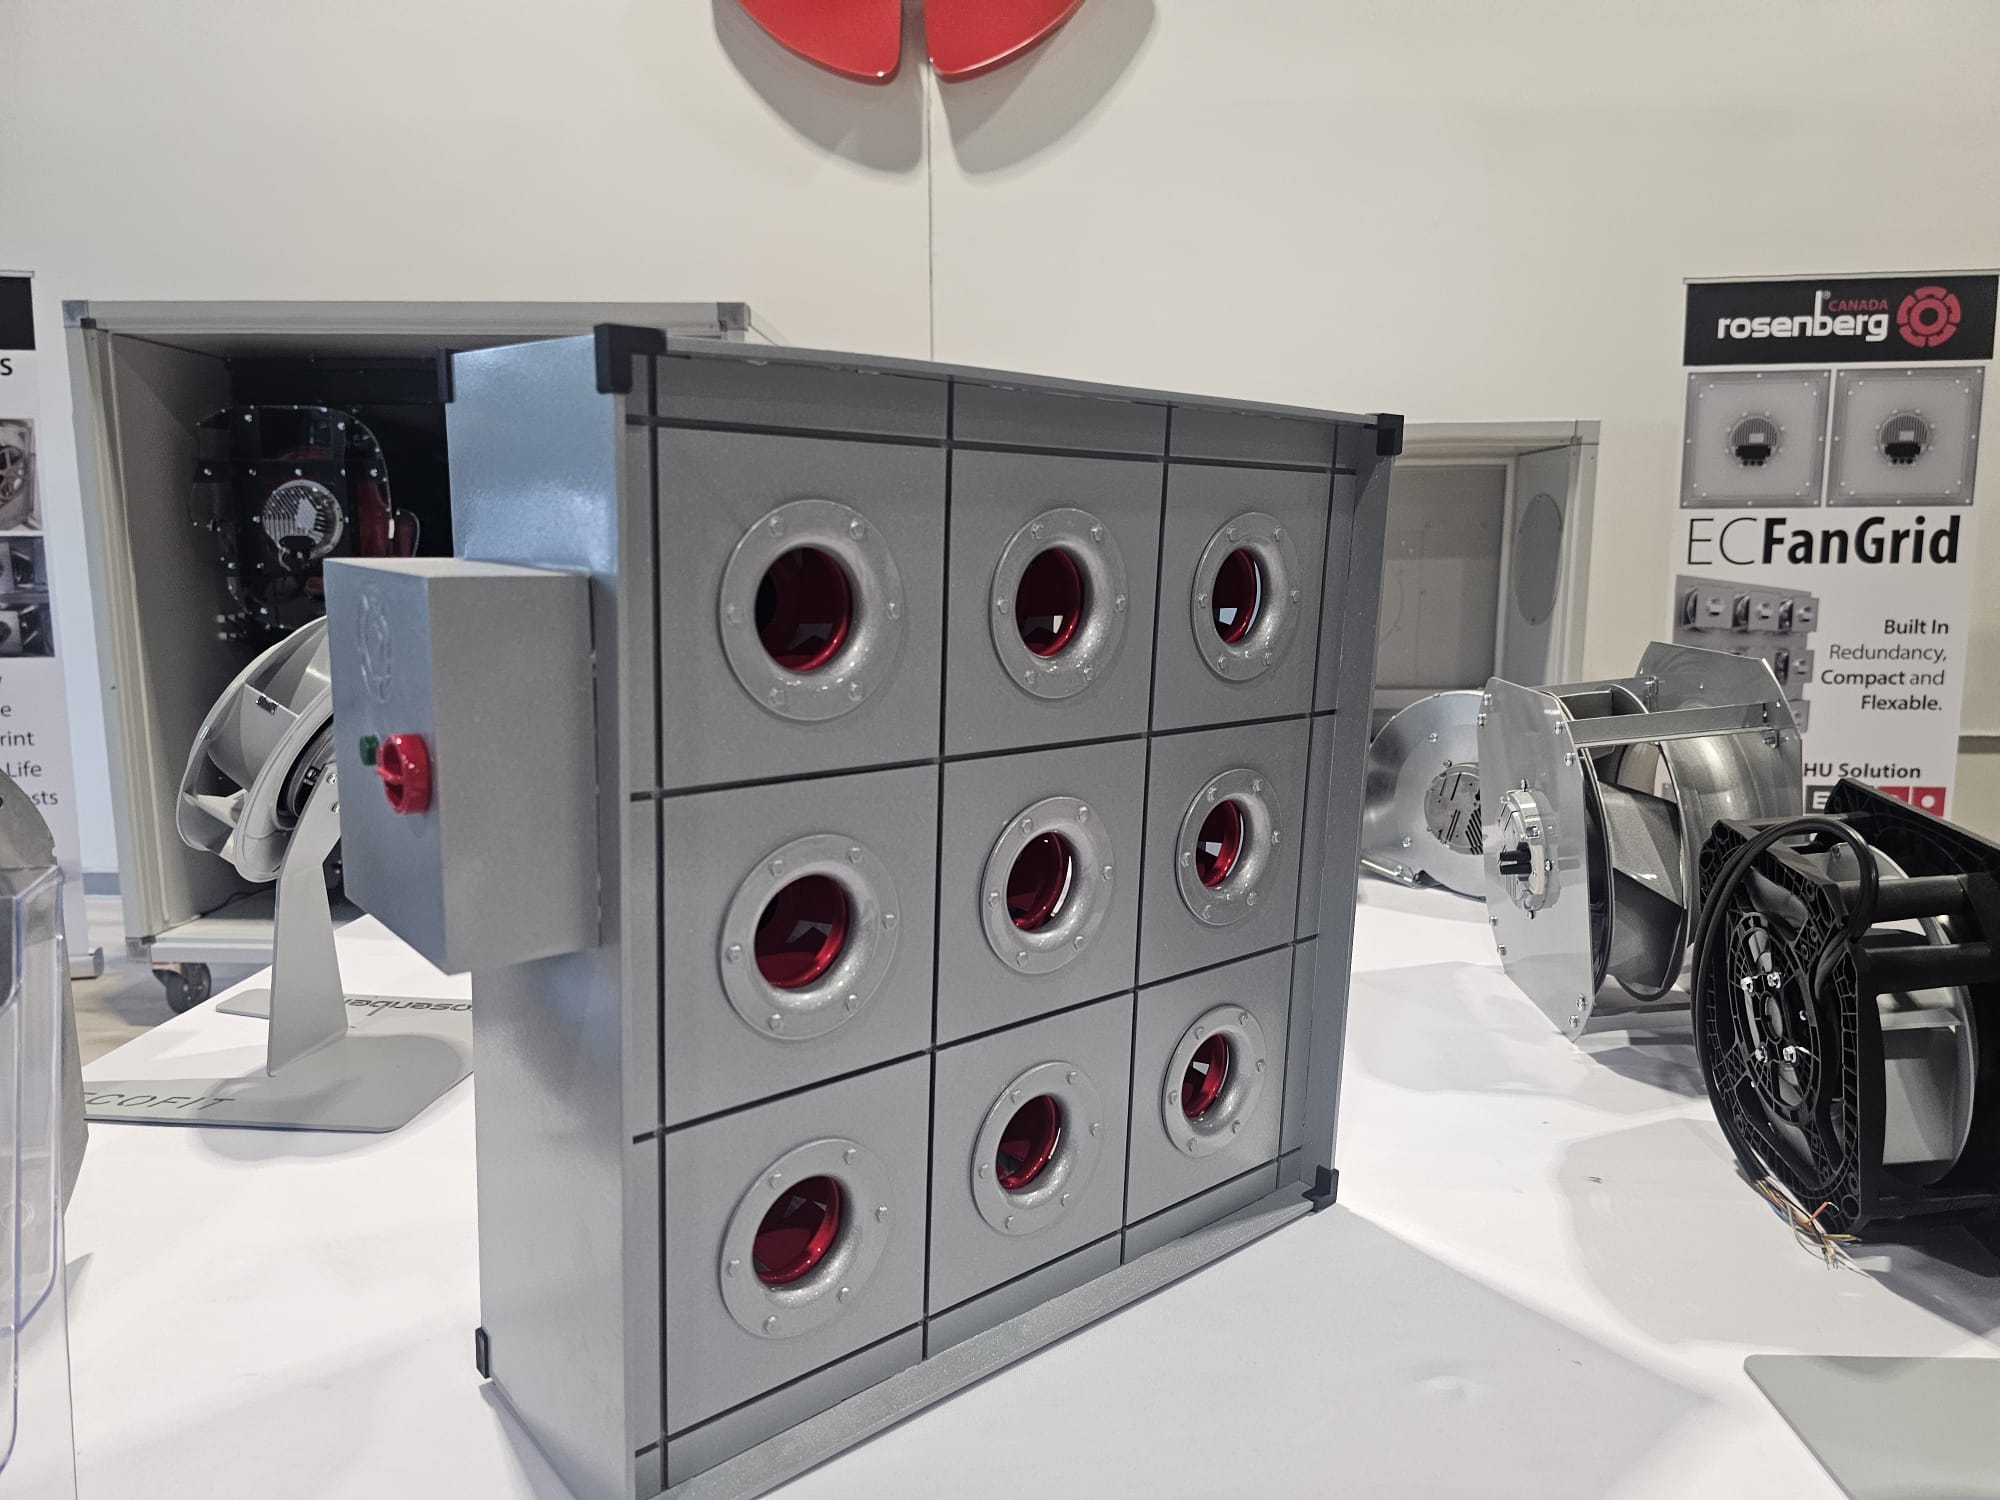
Rosenberg Canada required a professional display unit that could showcase its electronically commutated fan (EC) FanGrid technology in a way that was both visually impressive and practical for demonstration purposes. The finished unit needed to look like a polished, purpose-built product rather than a collection of individual prototype parts.
To achieve that, we combined CNC machining, laser cutting, SLA 3D printing, painting, finishing, and final assembly into one coordinated manufacturing process.
The result was a custom multi-fan display that presents Rosenberg’s technology clearly while also demonstrating what is possible when different manufacturing processes are brought together under one project.
Understanding the Goal
Before manufacturing begins, one of the most important steps is understanding how the finished product will actually be used.
This display was not simply a structural enclosure. It needed to perform several jobs at once.
It had to hold securely and present multiple fan components, provide accurate and consistent positioning, maintain a clean industrial appearance, allow the internal technology to remain visible, and be durable enough for repeated use in a showroom, sales presentation, exhibition, or trade show environment.
The appearance was especially important.
A demonstration unit represents the company whose technology is being displayed, so dimensional accuracy alone is not enough. The spacing, surface finish, alignment, hardware, color selection, and overall proportions all contribute to how the final product is perceived.
That meant every manufacturing process had to be selected according to what it could contribute best.
Step 1: Design and Engineering for Manufacturing
The project began with translating the overall display concept into manufacturable components.
Rather than trying to produce the entire unit using one process, the assembly was broken down into parts based on geometry, material requirements, strength, surface finish, and level of detail.
This is an important part of our approach at 3D Vector.
A successful custom manufacturing project is often less about asking, “How can we manufacture this?” and more about asking, “What is the best manufacturing process for each component?”
Large structural pieces can benefit from machining or sheet fabrication. Thin panels and accurately shaped profiles may be ideal for laser cutting. Components containing fine features or complex shapes may be better suited to 3D printing.
Designing with those processes in mind allows the final assembly to be produced efficiently while maintaining the required level of quality.
For the Rosenberg display, particular attention was given to the repeated grid layout. With nine fan positions arranged across the front face, even small dimensional errors would become very noticeable once the unit was assembled.
Hole positions, mounting locations, panel dimensions, spacing between components, and edge alignment therefore had to be carefully controlled.
Step 2: CNC Machining for Precision Components
CNC machining played an important role in producing components requiring precise geometry and repeatable dimensions.
CNC machining is particularly useful for projects like this because it allows us to create accurate openings, mounting locations, recesses, edges, and structural features directly from a digital model.
Once the machining program is prepared, the cutting tool follows controlled toolpaths to remove material and create the required geometry.
For a display assembly containing repeated components, consistency is extremely important.
If one opening is slightly higher than another or mounting holes are not positioned correctly, the misalignment becomes immediately visible across the grid. CNC machining helps maintain the dimensional control necessary to keep all of those elements aligned.
It also provides strong, durable parts that can become part of the structural framework of the finished display.
This is one of the reasons CNC machining continues to be extremely valuable even when a project also uses additive manufacturing. Each process solves a different problem.
Step 3: Laser Cutting for Accurate Fabricated Parts
Laser cutting was another key manufacturing process used during the project.
Laser cutting is highly effective for producing flat components, panels, profiles, brackets, and other sheet-based parts with accurate edges and repeatable geometry.
A focused laser beam follows a programmed cutting path, allowing complex profiles and openings to be produced efficiently.
For a display project, this provides several advantages.
Components can be cut to consistent dimensions, multiple identical parts can be produced accurately, and detailed profiles can be created without extensive manual fabrication.
Laser cutting also makes it possible to design components that fit together precisely during assembly.
That is particularly helpful when creating an enclosure made from several panels. Instead of relying heavily on manual measurement and adjustment during assembly, the geometry can be built into the digital design from the beginning.
The result is better repeatability and a cleaner finished product.
Step 4: SLA 3D Printing for Detailed Custom Components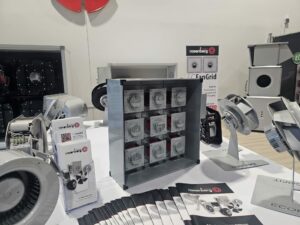
While CNC machining and laser cutting handled many of the larger and more structural components, SLA 3D printing allowed us to manufacture smaller parts and detailed geometries that would have been less practical to produce using conventional machining.
SLA, or Stereolithography, is a resin-based 3D printing process known for its excellent surface quality and ability to reproduce fine details.
Instead of cutting material away, SLA builds a component layer by layer using a liquid photopolymer resin that is selectively cured.
This makes the process especially useful for components with complex shapes, detailed features, custom interfaces, or geometry that would otherwise require multiple machining operations.
For display and presentation projects, surface finish is also important.
Compared with many other additive manufacturing processes, SLA can produce very smooth surfaces and crisp details. Once properly post-processed and painted, the components can integrate naturally with conventionally manufactured parts.
This is a good example of why 3D printing should not always be viewed as a replacement for traditional manufacturing.
In many professional applications, it is most powerful when used alongside CNC machining, laser cutting, fabrication, and finishing.
Step 5: Test Fitting and Assembly
Manufacturing the individual parts is only part of the job.
Before final finishing, components need to be inspected and test fitted to ensure that everything works together as intended.
This stage allows us to verify important details such as mounting alignment, spacing between components, panel fit, fastener locations, clearance around the fan assemblies, and the overall proportions of the display.
For an assembly containing repeated components, this becomes particularly important.
A dimensional issue affecting one part may be multiplied across several positions, so test fitting before final finishing can prevent unnecessary rework later.
The ability to manufacture parts using several different processes also means their tolerances need to work together.
A CNC-machined component, laser-cut panel, and SLA-printed part may each behave slightly differently during manufacturing. The design and assembly process has to account for those differences.
This is where experience with multiple manufacturing technologies becomes valuable.
Rather than treating every component independently, the entire assembly needs to be considered as one finished system.
Step 6: Surface Preparation and Painting
Once the manufactured components were confirmed to fit correctly, attention moved to surface preparation and painting.
This stage has a major effect on the perceived quality of the final product.
A technically accurate component can still look unfinished if machining marks, layer lines, inconsistent textures, or raw material surfaces remain visible.
Surface preparation may include cleaning, sanding, smoothing, correcting small imperfections, and preparing each substrate so that the coating can adhere correctly.
The components were then finished with a professional painted appearance to create a consistent visual language across the assembly.
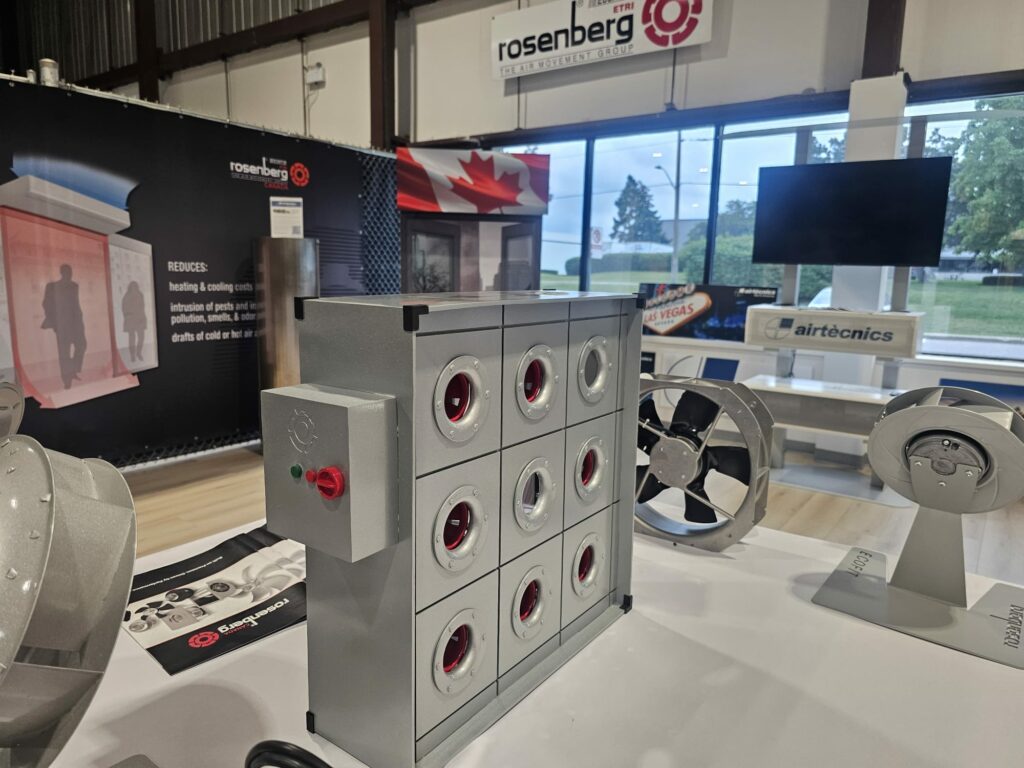
The metallic grey finish provides an industrial, engineered aesthetic, while the red internal fan components create strong visual contrast.
Black panel lines and corner details further define the structure and make the individual fan positions easy to distinguish.
The result is a display that feels cohesive even though its components were manufactured using several completely different technologies.
This is an important point.
When multi-process manufacturing is done well, the viewer should not immediately think about how many different production methods were used. Everything should look like it belongs together.
Step 7: Final Integration
After finishing, the components were brought together for final assembly.
The nine fan positions were installed into the grid structure, panels were aligned, hardware was secured, and the overall display was checked from multiple viewing angles.
At this stage, small details matter.
Panel gaps, fastener alignment, consistent spacing, edge transitions, and finish quality all contribute to the final presentation.
The completed unit demonstrates Rosenberg Canada’s fan technology from both the front and rear.
From the front, the repeated circular openings create a clean and organized presentation of the FanGrid arrangement.
From the rear, the individual fan motors and assemblies remain visible, allowing the display to communicate more of the engineering behind the technology.
This makes the unit useful not only as a visual display, but also as an effective demonstration and sales tool.
Why We Used Multiple Manufacturing Processes
One of the key lessons from this project is that there is rarely one manufacturing technology that is best for every component.
Each process brought a different advantage.
CNC machining provided accuracy, repeatability, and strong precision components.
Laser cutting allowed efficient production of accurate flat profiles and fabricated pieces.
SLA 3D printing made it possible to produce detailed custom geometries and components with a high-quality surface finish.
Painting and finishing transformed parts produced using different technologies into one visually consistent assembly.
And careful final assembly ensured that all of those components worked together as a complete product.
Combining manufacturing processes in this way also gives designers greater freedom.
Instead of compromising a design because a particular feature is difficult to machine, the feature can potentially be produced additively. Instead of 3D printing a large simple panel, it may be faster and more cost-effective to laser cut it. Instead of fabricating a precision feature manually, it can be CNC machined.
The objective is not to force every project into one technology.
The objective is to select the right process for the right component.
Manufacturing Beyond Prototypes
3D printing is often associated with prototyping, but projects like this show how additive manufacturing can also become part of a much broader production workflow.
At 3D Vector, we see 3D printing as one tool within a complete manufacturing toolbox.
When combined with CNC machining, laser cutting, fabrication, professional finishing, and assembly, it becomes possible to produce much more than a basic prototype.
The same approach can be used for:
- Custom trade show displays
- Product demonstration units
- Industrial presentation models
- Functional prototypes
- Custom equipment housings
- Machine and equipment components
- Marketing displays
- Low-volume production assemblies
- Engineering mock-ups
- Custom fixtures and enclosures
For companies developing a new product or looking for a unique way to demonstrate an existing one, having access to multiple manufacturing processes can significantly simplify development.
Instead of coordinating separate suppliers for machining, laser cutting, 3D printing, finishing, and assembly, the project can be approached as one integrated manufacturing challenge.
The Finished Rosenberg Canada Display
The completed Rosenberg Canada display is a great example of what can be achieved when digital manufacturing technologies and traditional production methods are combined effectively.
From the precision of CNC machining and laser cutting to the flexibility of SLA 3D printing and the visual impact of professional finishing, every stage contributed something different to the final result.
What started as a display concept became a durable, polished physical product capable of presenting Rosenberg’s EC FanGrid technology in a professional environment.
For us, projects like this represent what modern manufacturing is becoming: not one process competing against another, but multiple technologies working together.
At 3D Vector, our goal is to help customers move from an idea or CAD model to a professionally manufactured physical product. Whether that involves CNC machining, laser cutting, SLA 3D printing, finishing, or a combination of several processes, we select the manufacturing approach based on the project’s requirements.
If you have a custom display, prototype, enclosure, demonstration model, or specialized component that needs to be brought to life, 3D Vector can help turn the concept into a finished product.